Please find step-by-step instructions for using MyMedia below.
1. Navigate to the MyMedia website, and select the Login with UTORid button to login with your UTORid and password.
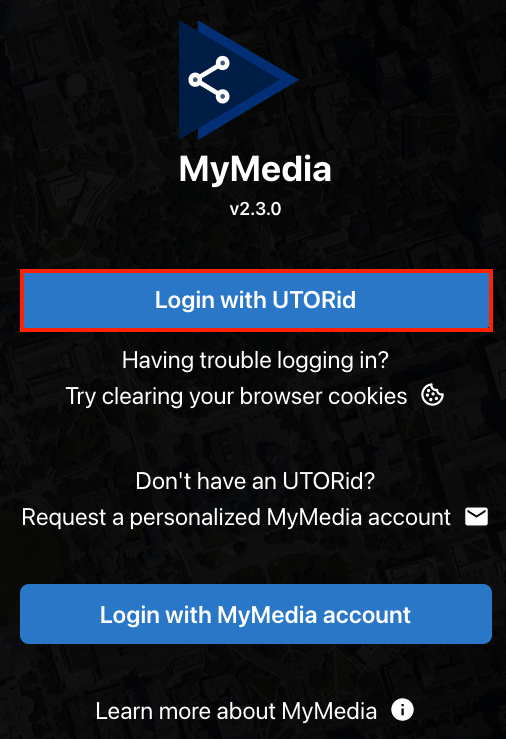
Note: If you do not have a UTORid, you can request a personalized MyMedia account by selecting the Request a personalized MyMedia account link or emailing: help.desk@utoronto.ca.
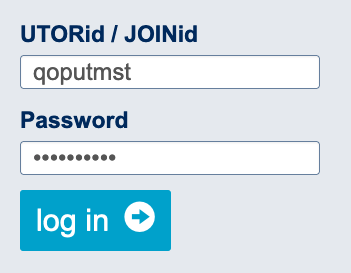
2. Enter your UTORid and Password to log into MyMedia.
Once logged into MyMedia you can access the following:
a. Files - to see a list of your files, add and share media.
b. Playlist (coming soon) – to create and manage your Playlists (collection of media files).
c. Groups (coming soon) – to allow better management of shared accounts (coming soon)
d. My Activities – to see a list of what you have done in MyMedia.

Back to top
Uploading Media
1. Select Files and then select the Upload button.

2. Drag-and-drop the files into the Bulk Uploader area or select browse files to select the file(s) that you wish to upload.

3. Select +Add more to add additional files if needed and then select the Upload button to upload the file(s).
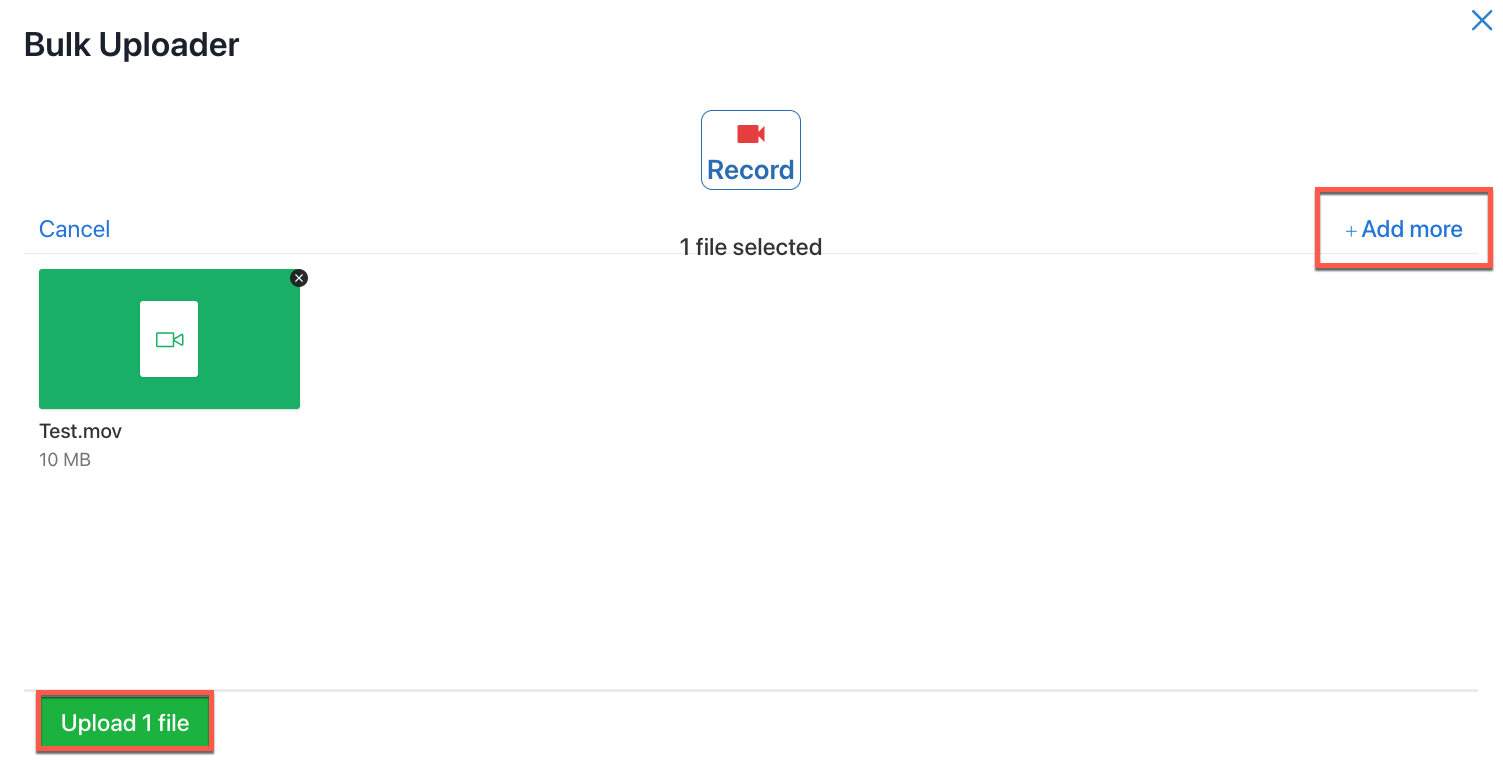
Note: By selecting "Upload", you certify that this media does not violate the Appropriate Use of Information and Communication Technology policy, and that you hold all copyrights to this media and its contents or have authorization to upload it.
Back to top
Record Media Directly in MyMedia
1. Select Files and then select Upload.

2. Select the Record button

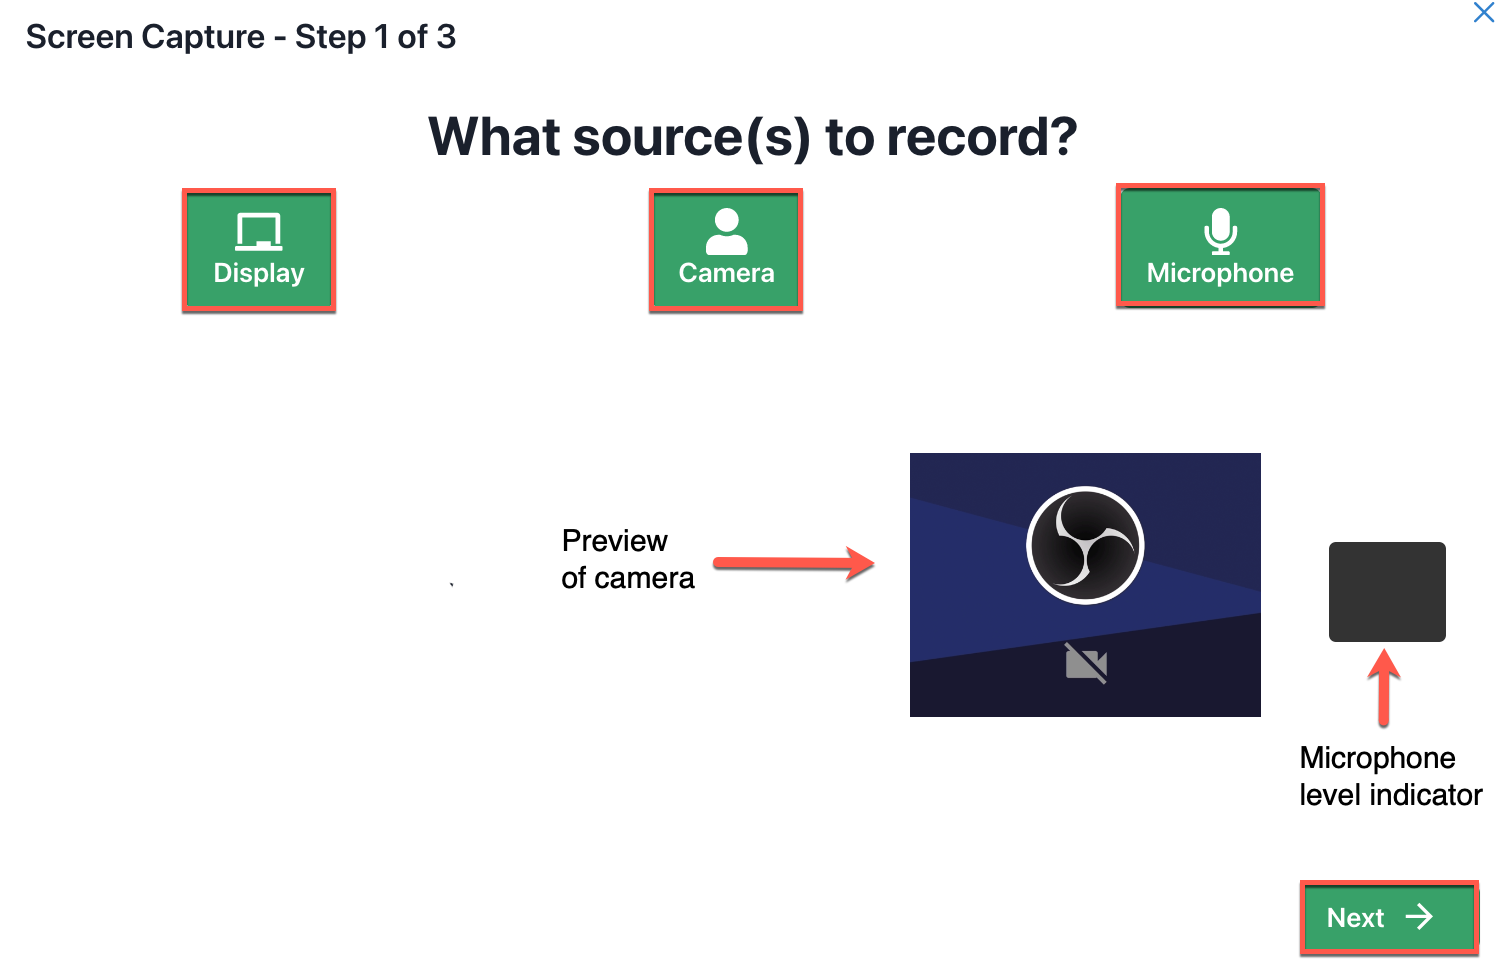
3. Select whether to record the Display, Camera and/or the Microphone and select Next.
Note: Depending on your browser and its settings, you may have to choose which devices MyMedia has permission to access. You will have the chance to preview the video from the camera as well as determine the audio levels from the microphone.
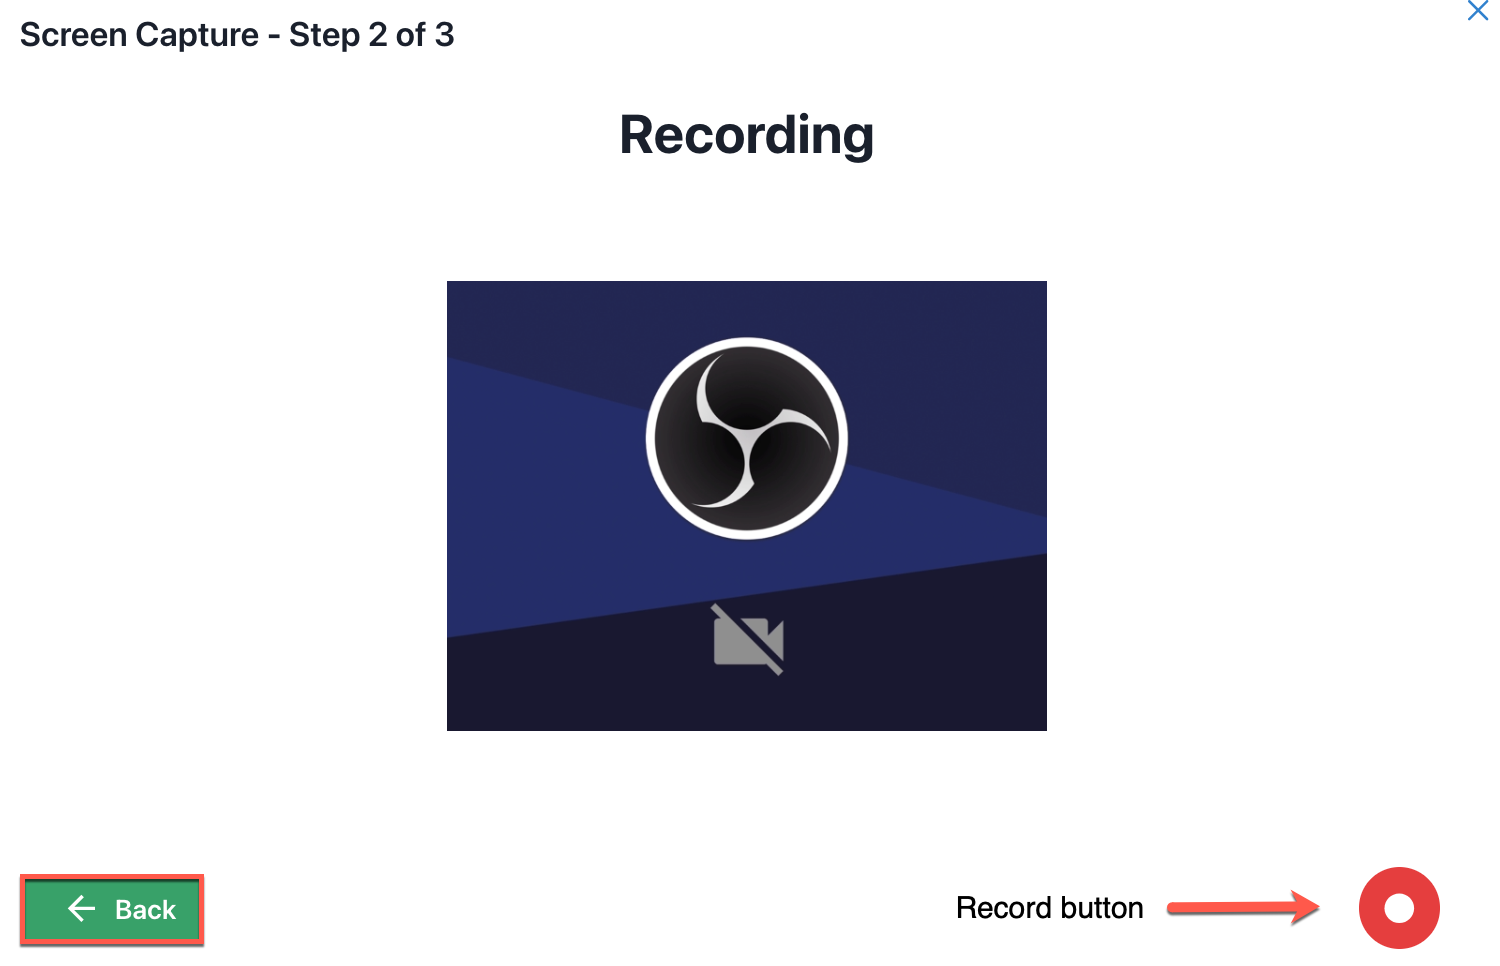
4. Select the record button to begin capturing from your selected sources or select the Back button to go the previous screen and make changes to your selections.
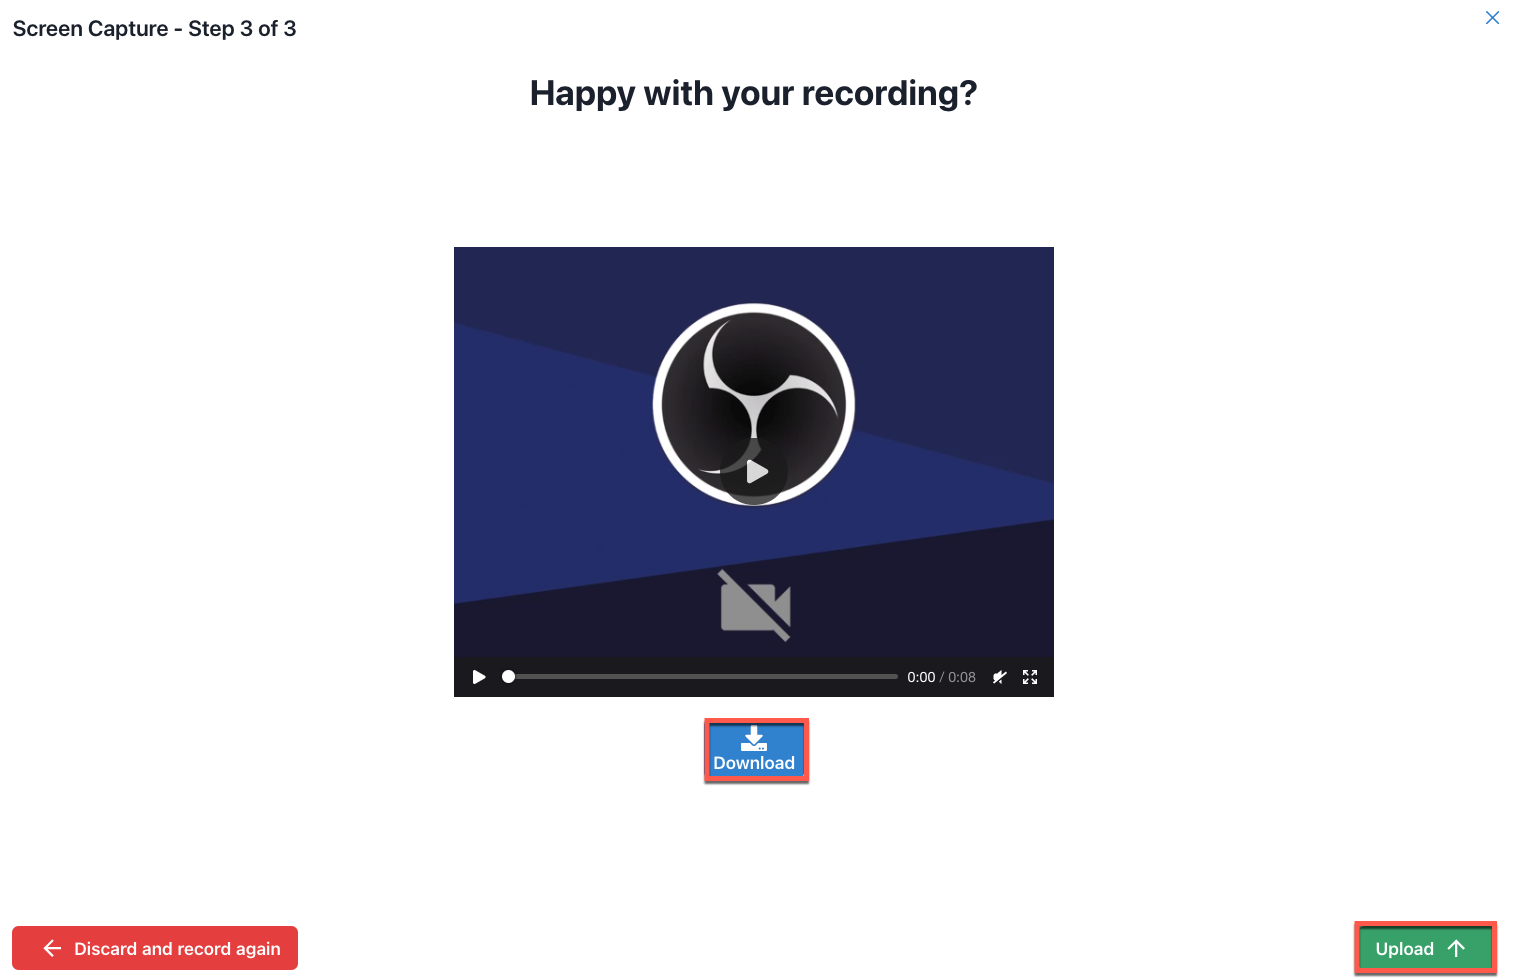
5. Select the Upload button to upload and save your recording to MyMedia if you are happy with it or select the Discard and record again button to start over. You can also select the Download button to save a copy of the record to your computer.
Back to top
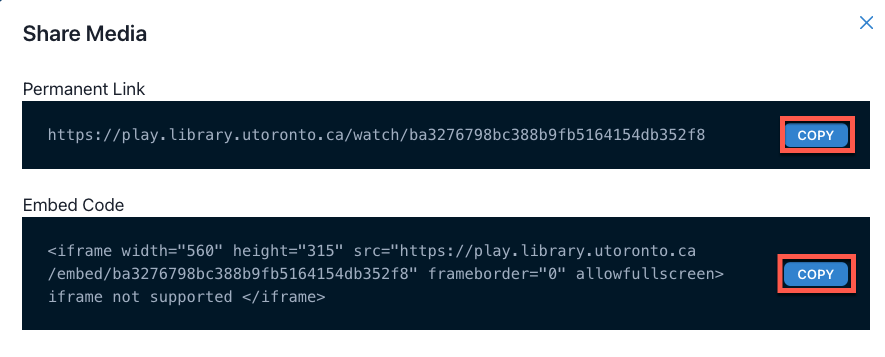
1. Select FILES and then select the share icon.

2. Select COPY to copy either the Permanent Link or the Embed Code to be used outside of MyMedia to provide access to the video.
Back to top
Set Visibility of the Video
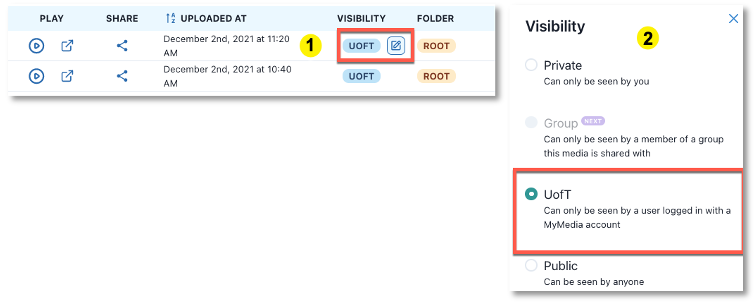
1. Hover over the text under the Visibility column and select the pencil icon to specify who will be able to access the media.
2. A list of visibility options will appear and select the one that is most appropriate for your video.
Note: By default, the video will be accessible to any user in the U. of T. community that is logged in with a MyMedia account. However, they will need the link to access the video.

Back to top
1. Select FILES and select the pencil icon to the left of the file that you wish to edit.

A pop up window will appear that allows you to edit the Metadata, the Privacy options or Text Tracks to add closed captions.
2. Edit the Metadata for the media files by selecting the Metadata tab and click on the respective pencil icon to:
1. Edit the Title
2. Edit the Description,
3. Edit the Keywords of the video or to
4. Add a Thumbnail.
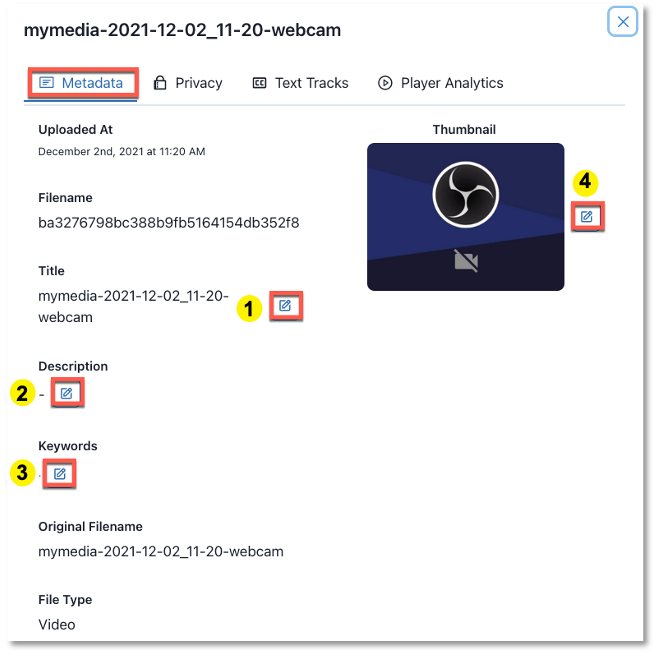
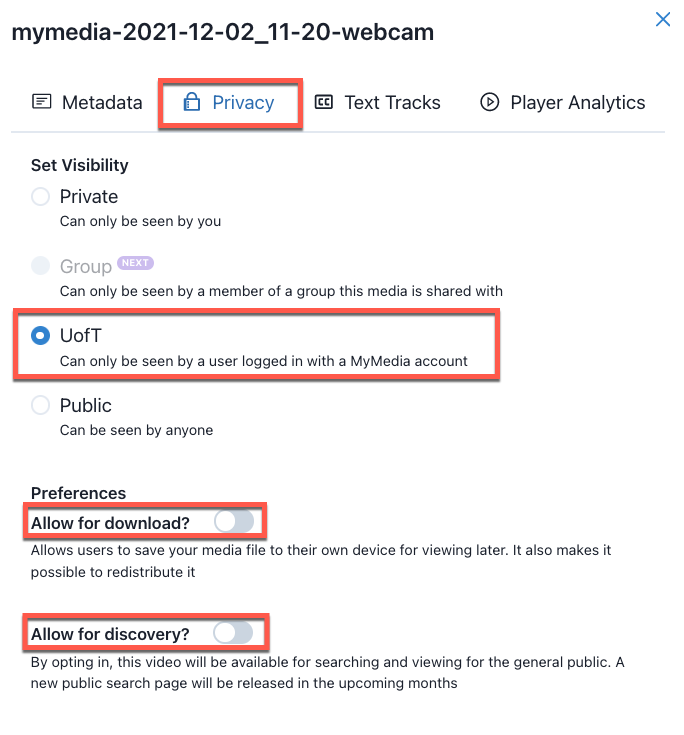
3. Edit the Privacy of the media files by selecting the Privacy tab and select the desired option under Set Visibility to specify whether it is Private to you alone, visible to anyone in the U. of T. community signed in with a MyMedia account, or Public where it can be seen by anyone with the link.
Note: By default, the visibility of the video is set to UofT
a. Select Allow for download so that the file can be downloaded to users’ devices.
b. Select Allow for discovery to make the video available for searching and viewing to the general public.
Back to top
Adding Text Tracks (Closed Captions)
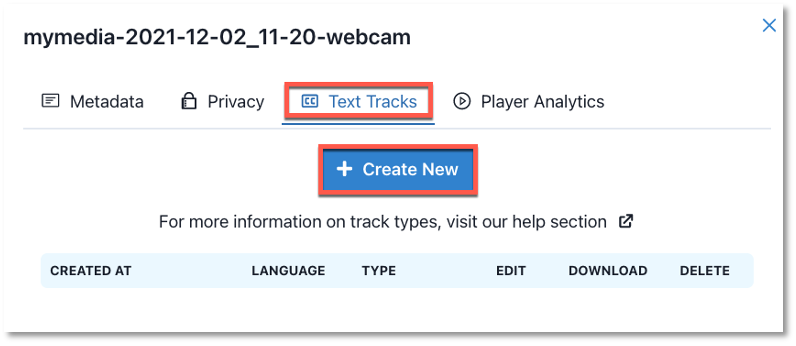
1. Select the Text Tracks tab and select the + Create New button.
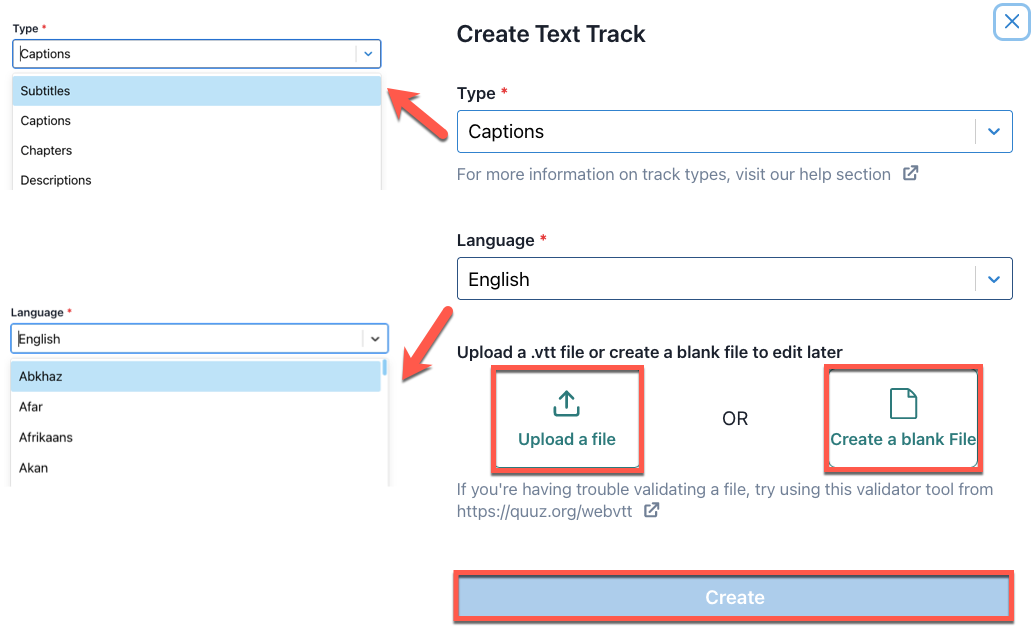
2. Select the Text Track Type and Language. Select either:
a. Upload a file to upload an existing file or
b. Create a blank File and select the Create button to create a blank Text Track file.
Upload a file
The process to upload the caption file will depend on how the video was created and where it is stored.
|
Location of Video
|
I have a caption file already created
|
I don’t have a caption file already created
|
|
On My Computer
|
Upload video and caption files to MyMedia
|
Upload the video to MS Stream to autogenerate the caption file. Then download the caption file onto your computer. Upload the video and caption files to MyMedia.
|
|
Zoom Cloud
|
Download the video onto your computer and upload the video and caption files to MyMedia
|
Download the video onto your computer. Upload the video to MS Stream to autogenerate the caption file. Then download the caption file onto your computer. Upload the video and caption files to MyMedia.
|
|
MS Stream
|
Download the video and the auto generated caption files onto your computer. Then upload the video and caption files to MyMedia
|
Select Autogenerate captions. Once the processing has been completed, download the video and the autogenerated caption file to your computer. Upload the video and captions files to MyMedia.
|
Note: If you have a Zoom cloud video then you can download the audio transcript from your cloud recording. More information can be found in the Service Now Knowledge Base Article at the link provided below.
https://uoft.service-now.com/utm_iits?id=kb_article&sysparm_article=KB0011997
1. To upload a file, select the Upload a file button.
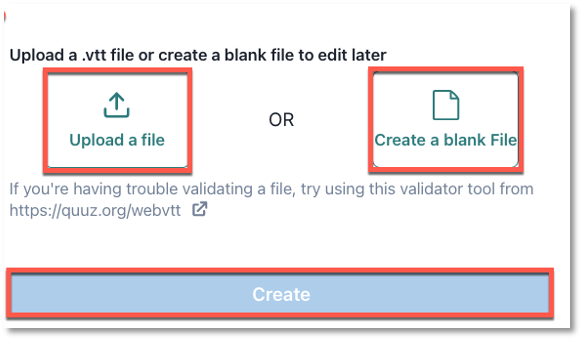
2. Select the file you wish to upload.

3. Select the Create button.
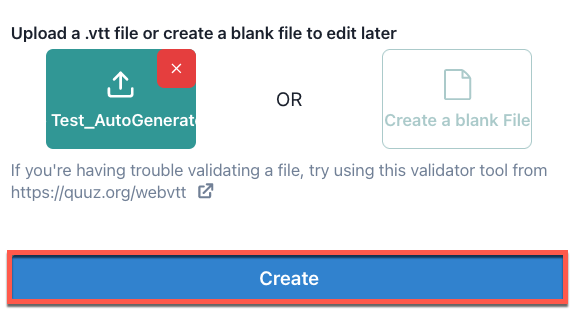
Note: You can select the red x at the top right of the file icon if you wish to remove the file and repeat the process.
4. Your file will now appear in the tracks list.

Create a blank file
1. Select Create a blank file and then select the Create button.
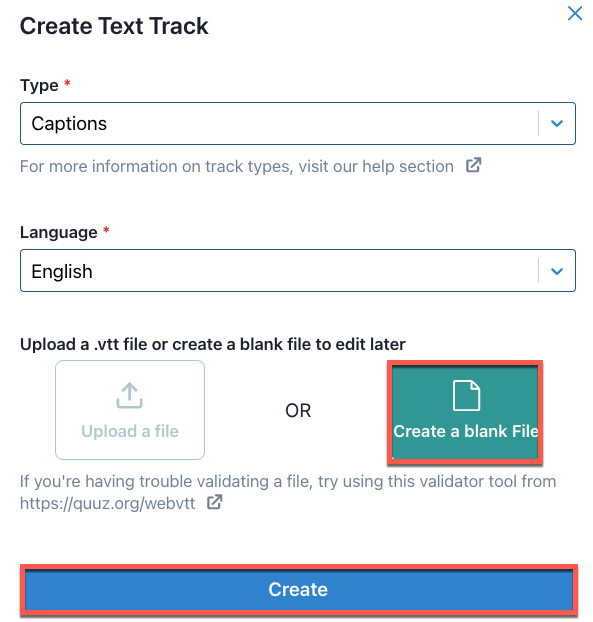
2. After creating the blank file, select the pencil icon to edit the Text Track.

3. Edit the text as needed and then select Save Changes.
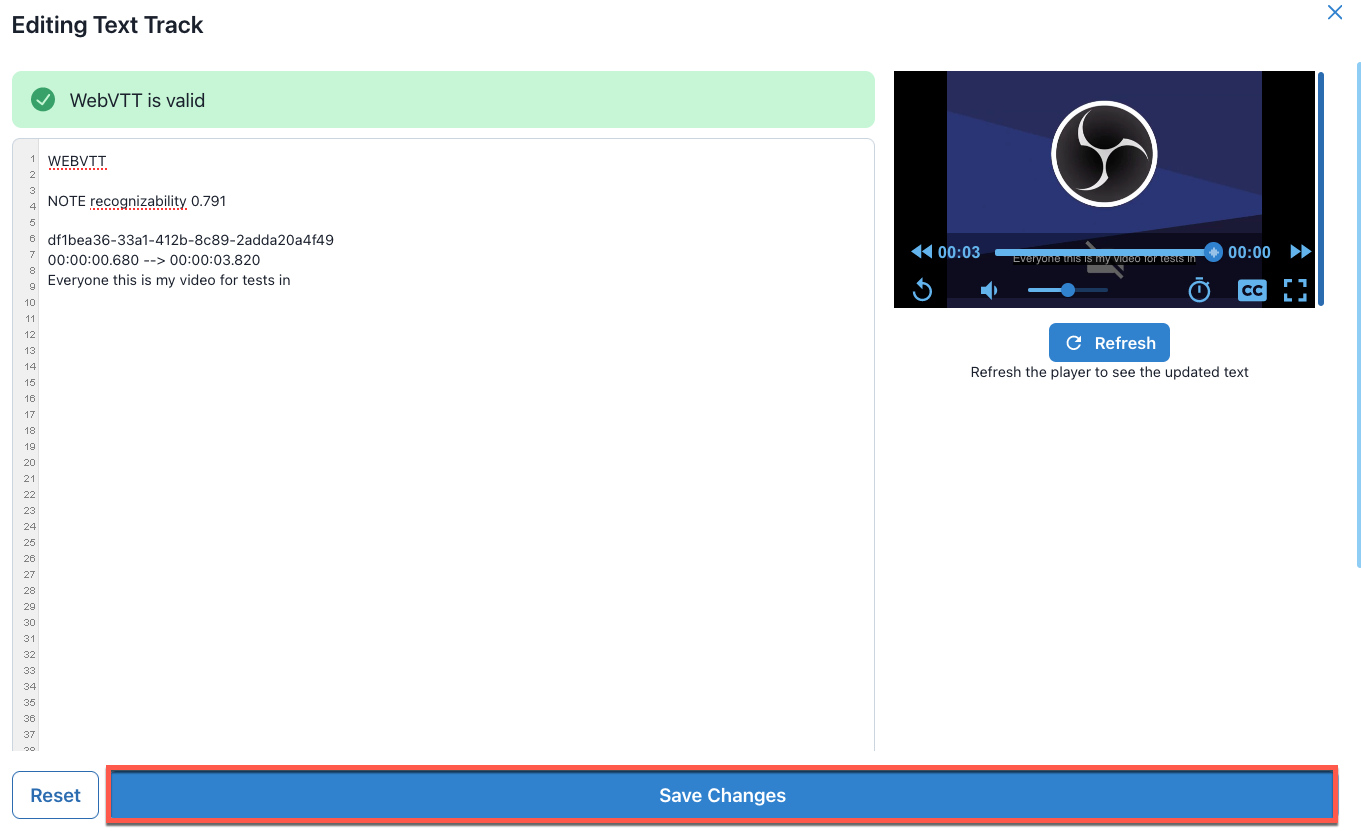
Note: You can choose Reset to undo your changes or Refresh to let the player see the updated text. You can close the window when you are done.
Back to top
Additional information about MyMedia and the services it offers can be found on their help page.
There are no size limits on the videos uploaded to MyMedia. Faculty and staff are able to upload an unlimited number of videos; however, students are limited to 40 videos and it is recommended that the videos do not exceed FullHD resolution (1920x1080), in order to reduce transcoding times for everyone involved, since processing is queued.
If you or your students have technical issues accessing MyMedia, please contact the U. of T. Information Commons Help Desk
• Submit a ticket to the U. of T. Information Commons Help Desk Service portal (requires UTORid and password)
• Email: help.desk@utoronto.ca
• Telephone: 416-978-4357
Please provide the following information to the U. of T. Information Commons Help Desk:
There are a couple reasons why your video may not have been processed, and thus you will not receive the email from MyMedia allowing you to finalize your video and view your recording. A potential problem is that the video has not finished uploading from the computer you used to record it, for example if a laptop was used to record a presentation and was then powered down shortly afterwards, the recording may not have completed uploading. In this case, you will need to power up the laptop and connect it to the internet to allow the presentation to resume uploading.
To check the status of your video that is still being process, you can also login to MyMedia https://mymedia.library.utoronto.ca/, select the Files link and view the process indicator.


